
![]()
Fuel Sender
Removing the fuel sender from the MK2 CRX.
Important - Read this First!
Before removing the sender make sure the level in tank is as low as possible, and use common sense when working with an open fuel tank. Keep the doors open to prevent a build up of vapour in the car, which can easily be ignited with a spark. If you are working in a garage, make sure there is plenty of ventilation, and those around you know there is an open fuel tank.
Naturally, if you intend to have the sender unit out for any length of time, you should drain the tank completely.
It's also worth mentioning that to gain access to the fuel pump you must remove the tank from the car, as it is offset to one side under the body.
Removal
The car shown here is a 1991 CRX, however removal is similar for a wide range of Honda vehicles. There is no need to remove the tank from the car to get to the sender as there is an access hole under the back seat.
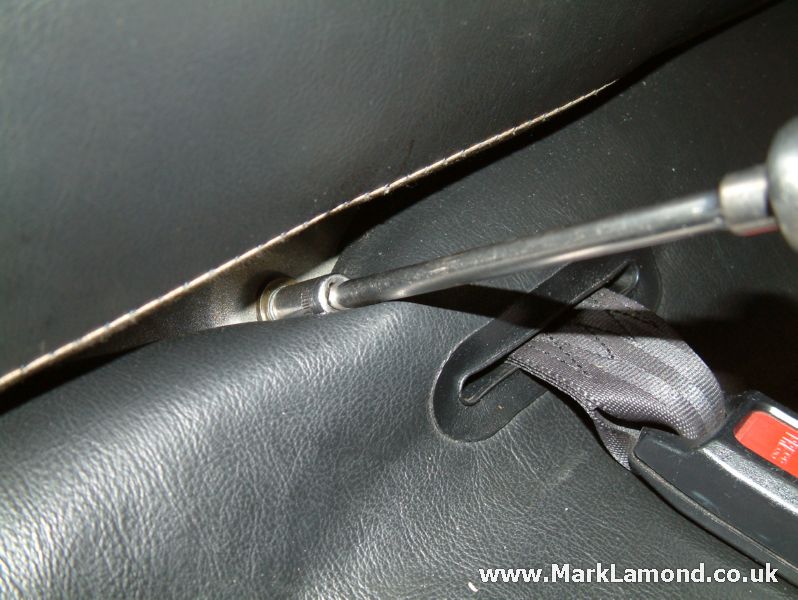 |
Remove the 10mm retaining bolt for the seat, pass the seat belt buckles through the openings and then flip up the seat from the rear to a vertical position and unhook at the front. It should just lift out. |
 |
Remove the 10mm retaining bolt for the seat, pass the seat belt buckles through the openings and then flip up the seat from the rear to a vertical position and unhook at the front. It should just lift out. With the seat removed, you can see the access hatch. Unplug the connector and undo the screws to remove the cover. |
 |
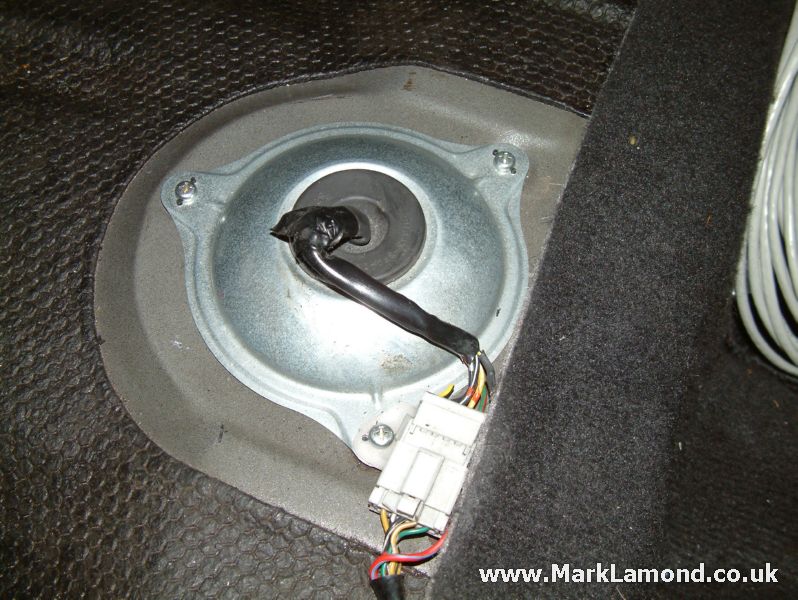
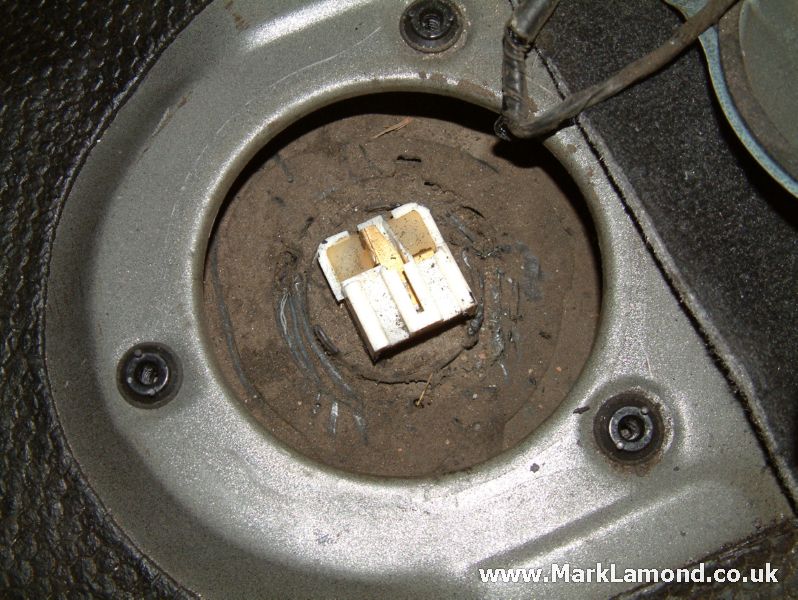
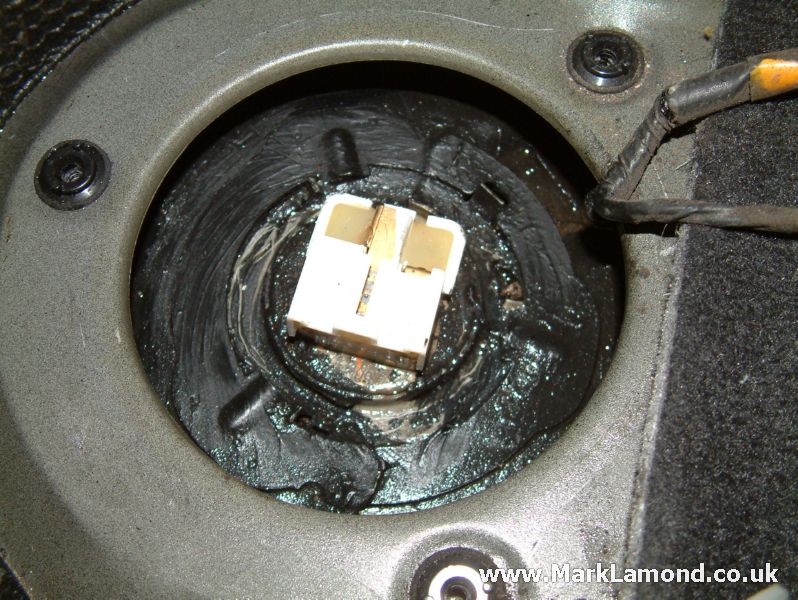
You can now unplug the connector to the sender unit itself, the other wires running off along the top of the tank are for the fuel pump. |
 |
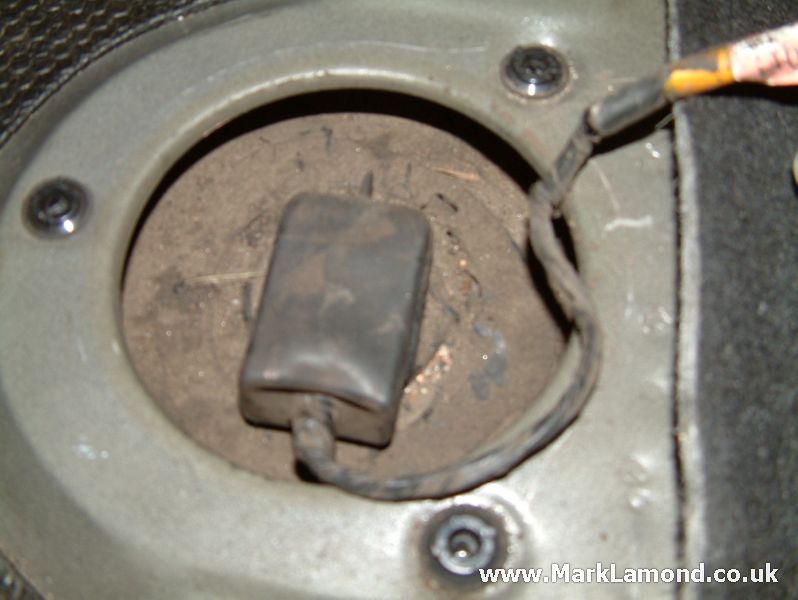
With the connector to the sender unplugged, wash round the top of the tank with a strong detergent and brush to remove all the dust as you don't want it to fall into the tank, it also allows you to get a clearer view of the retaining ring. Was away the detergent with water - it will run out off the top of the tank, so it's best to do this job outside. Do not worry about getting any water inside the tank, as the sender unit is well sealed although naturally you should dry off any excess water. |
 |
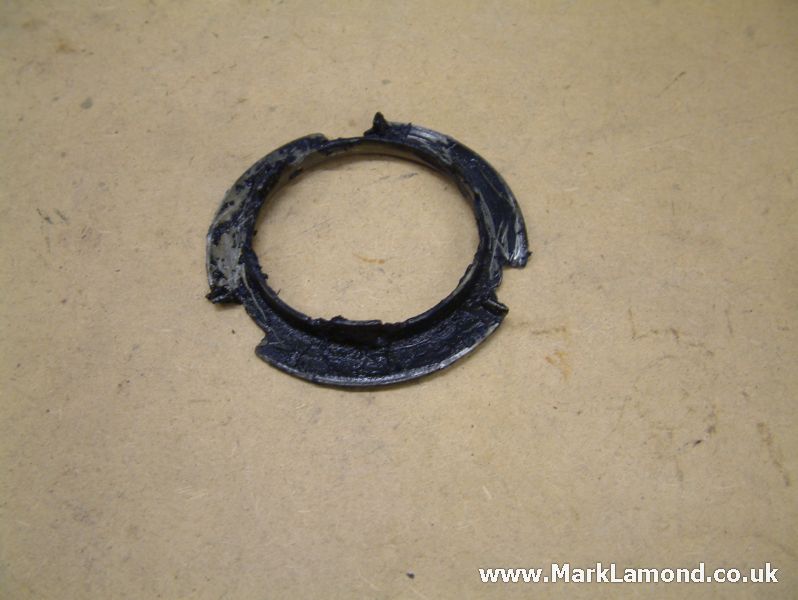
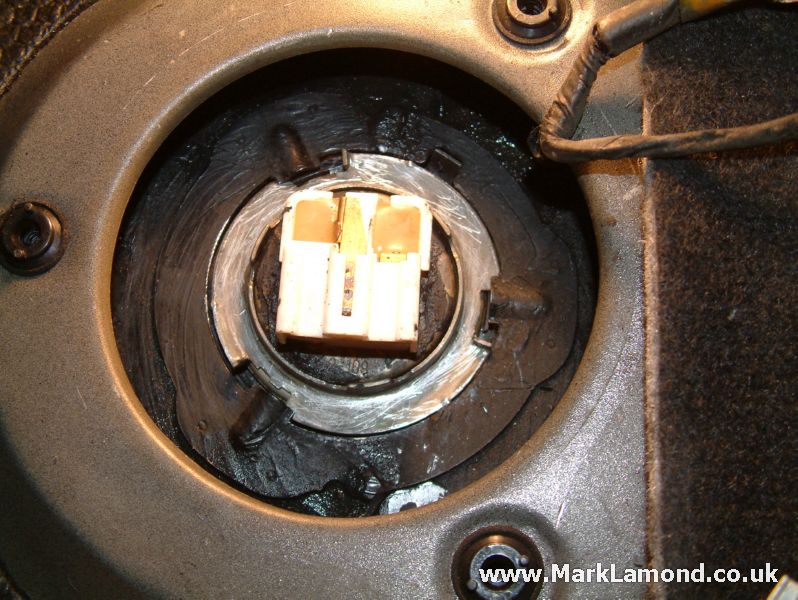
With everything clean you can see the retaining ring.
Honda have a special tool available at cost to remove
this ring, but you can make do with a large screwdriver
or preferably steel rod to gently tap the ring round.
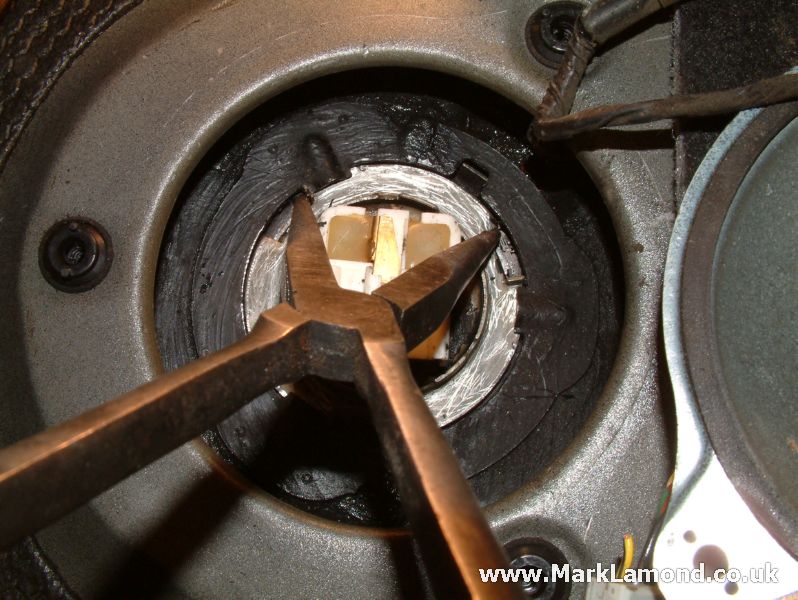
You may be able to loosen it with a pair of large long
nosed pliers, but it usually need some persuasion the
first time. Be careful not to bend or twist the
retaining ring, it does not need much force to remove
it. You must rotate it anticlockwise until the lugs line up the bracket on the tank, allowing you to lift out the ring. The ring has a cam on it to press the sender unit and seal down hard to the tank - once this has been passed it should spin round without too much trouble, depending on how much dust & grit is still stuck in the ring & bracket! |
 |
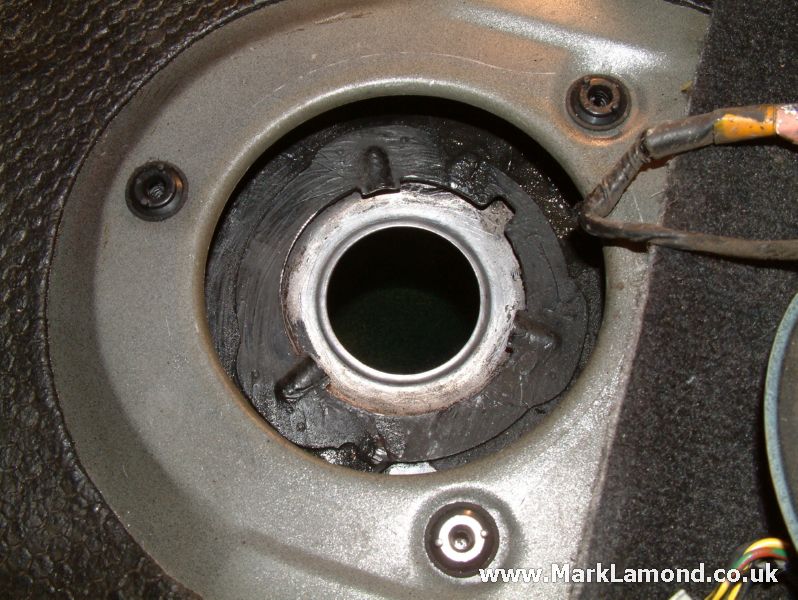
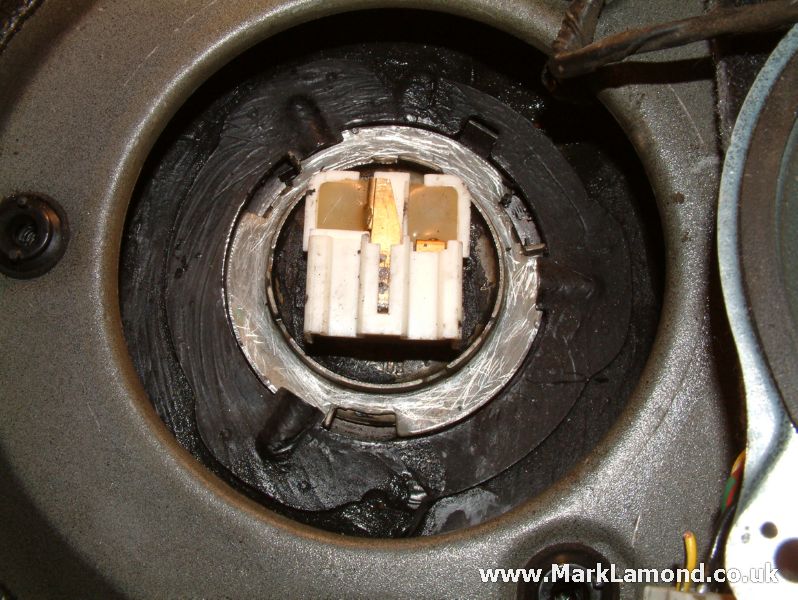
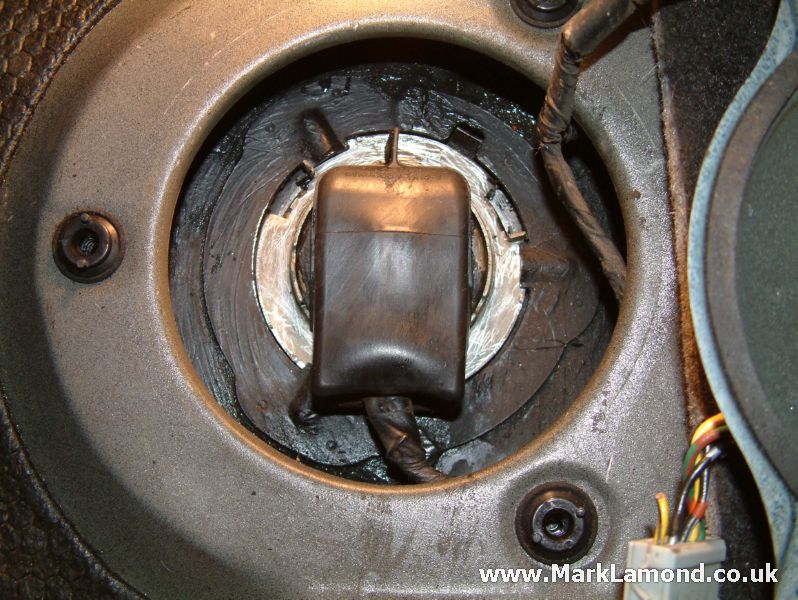
When the ring is free, carefully lift out the sender and be careful not to bend the float arm. It has a rubber seal which may fall down when the sender is lifted out, so make sure to take note of which way round it fits. |
 |
It's also worthwhile to clean up the ring and top of the sender unit now they are out. |
Refitting
 |
To refit the sender, make sure the rubber seal is correctly fitted on the sender unit. |
 |
Now place the sender unit into the tank, making sure it is correctly located - there is a tab on the top that lines up with a groove on the ring's bracket. |
 |
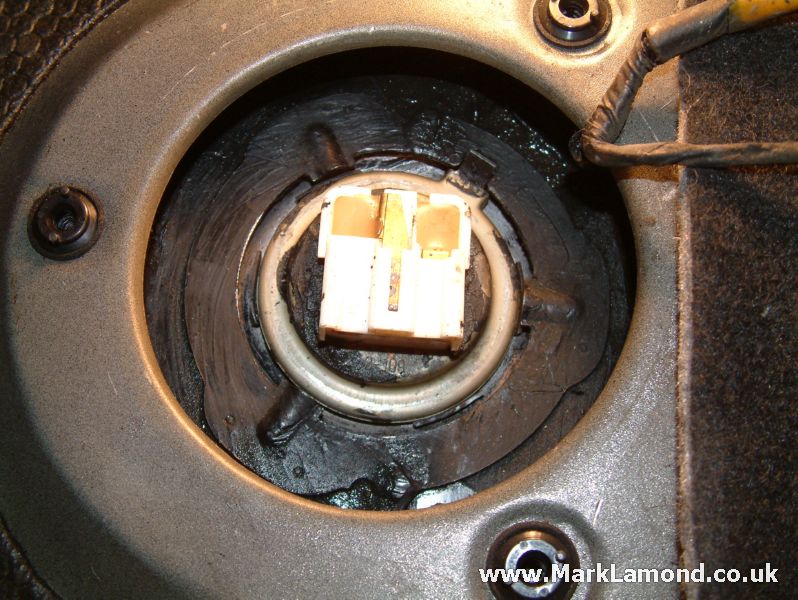
Now place the cleaned up ring into the bracket and let it drop down, you will have to press down on the sender to compress the seal while doing this. Note that the sender on the B16 engined cars is slightly different to the earlier D series models, as it is spring loaded to press down on the bottom of the tank, so requires a little more force. |
 |
I managed to tighten the ring with a some long nosed pliers. Tighten the ring until it reaches the end stop, do not force it and be careful not to distort the ring or the bracket. |
 |
The ring correctly installed. |
 |
You can now install the connector again, notice that i have also cleaned up the rubber cover to keep everything tidy. Screw the access hatch back down, plug in the connector to the main loom, and that's it. |